The Complete Guide to Building Your First Gaming PC in 2026

Building your first gaming PC feels intimidating. You’re staring at a pile of expensive components, wondering if you’ll break something or forget a crucial step. But here’s the truth: if you can follow a recipe or assemble furniture, you can build a gaming PC. The process is more straightforward than you think, and the payoff is huge. You’ll save money compared to pre-built systems, understand exactly what’s inside your machine, and gain the satisfaction of creating something with your own hands.
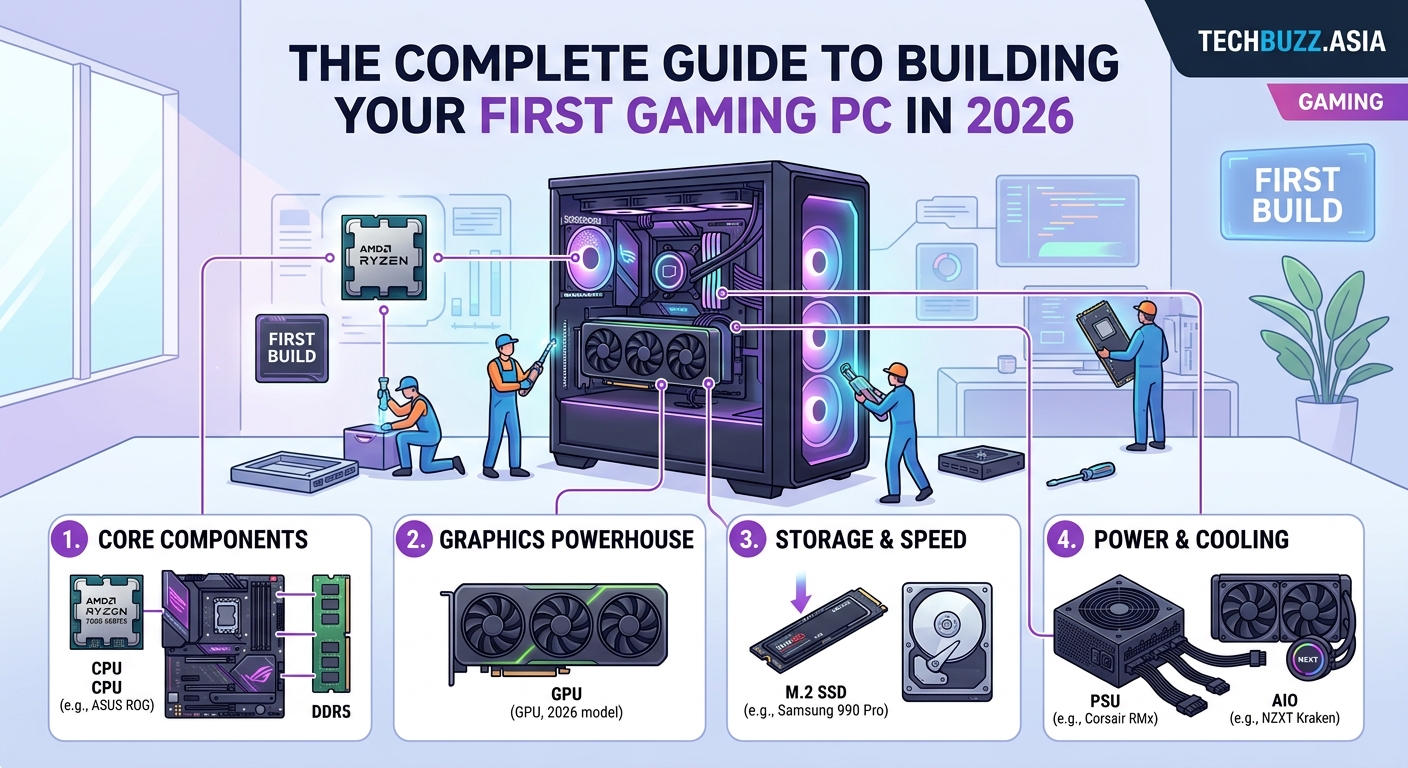
Building a gaming PC requires seven core components: CPU, motherboard, RAM, GPU, storage, power supply, and case. The process takes 2-3 hours for first-timers. You’ll need basic tools, patience, and careful component compatibility checks. Most mistakes are reversible, and the result is a custom machine that outperforms pre-built alternatives at the same price point while teaching you valuable technical skills.
Understanding the Core Components You’ll Need
Every gaming PC needs seven essential parts. Each one serves a specific purpose, and they all need to work together.
The CPU (processor) handles all calculations and instructions. Think of it as the brain. For gaming in 2026, you want at least a mid-range processor from AMD’s Ryzen 7000 series or Intel’s 13th/14th gen lineup.
The motherboard connects everything. It determines what other components you can use, so choose this carefully. Make sure it matches your CPU socket type and has enough slots for your RAM and storage.
RAM (memory) stores data your system needs right now. 16GB is the minimum for modern gaming. 32GB gives you breathing room for multitasking and future games.
The GPU (graphics card) renders everything you see on screen. This is usually your most expensive component. For 1080p gaming, mid-range cards work great. For 1440p or 4K, you’ll need more horsepower.
Storage holds your operating system, games, and files. Get an NVMe SSD for your main drive. They’re fast and affordable now. A 1TB drive gives you space for your OS and several large games.
The power supply (PSU) delivers electricity to all components. Don’t cheap out here. A quality 650W-750W unit from a reputable brand protects your investment.
The case houses everything and provides cooling. Pick one with good airflow and enough space for your GPU. Cable management features make assembly easier.
Checking Compatibility Before You Buy
Component compatibility can make or break your build. One wrong choice means returning parts and waiting days for replacements.
Start with your CPU and motherboard. AMD and Intel use different sockets. An AMD Ryzen 7 7800X3D needs an AM5 motherboard. An Intel Core i5-13600K needs an LGA 1700 board. Check the specifications twice.
Your motherboard also determines RAM compatibility. DDR4 and DDR5 are not interchangeable. Most 2026 builds use DDR5, but some budget boards still use DDR4. Verify which type your motherboard accepts.
GPU clearance matters more than people realize. Measure your case’s maximum GPU length before buying. Modern high-end cards can exceed 320mm. Your case specifications list this measurement clearly.
Power supply wattage needs calculation. Add up your component power draw and add 20% headroom. Online PSU calculators make this easy. A system with a mid-range CPU and GPU typically needs 550W-650W.
PCPartPicker is your best friend during planning. The site automatically flags compatibility issues and shows current prices across multiple retailers. Use it to build your parts list before buying anything.
Check if your case supports your motherboard size. ATX is standard. Micro-ATX and Mini-ITX are smaller. Your case must physically fit your board.
Gathering Tools and Workspace Preparation
You don’t need a full workshop. A few basic items and a clean space are enough.
Essential tools:
– Phillips head screwdriver (magnetic tip helps)
– Zip ties or velcro straps for cables
– Small flashlight or headlamp
– Anti-static wrist strap (optional but recommended)
Find a large, flat workspace. A dining table or desk works perfectly. Avoid carpet if possible. Static electricity can damage components, though modern parts are more resilient than older hardware.
Good lighting matters. You’ll be looking at small connectors and reading tiny motherboard labels. Natural light or a bright desk lamp prevents mistakes.
Keep component boxes nearby. If something doesn’t work, you’ll need the original packaging for returns. Store manuals where you can grab them. You’ll reference the motherboard manual constantly.
Installing the CPU and Cooler
This step makes people nervous. CPUs are expensive and look fragile. But the installation is actually simple if you’re gentle and careful.
- Open the CPU socket on your motherboard by lifting the retention arm
- Remove the protective cover from the socket
- Hold your CPU by the edges, never touching the pins or contacts
- Align the CPU with the socket using the marked corner or notch
- Gently place the CPU into the socket without forcing it
- Lower the retention arm to lock it in place
The CPU should drop in with zero resistance. If you feel any resistance, stop. You’re probably misaligned.
Installing the cooler depends on your type. Stock coolers that come with CPUs usually have pre-applied thermal paste. Aftermarket coolers often require you to apply paste yourself.
For thermal paste application, use a rice grain sized amount in the center of the CPU. The cooler’s pressure spreads it evenly. More paste isn’t better. Excess paste can spill over the edges and make a mess.
Mount the cooler according to its instructions. Different coolers use different mounting systems. Tighten screws in a diagonal pattern, like tightening car wheel lugs. This ensures even pressure.
Connect the cooler’s fan cable to the CPU_FAN header on your motherboard. Check your motherboard manual for the exact location. This header usually sits near the CPU socket.
Installing RAM and Storage
RAM installation is satisfying. The click when it locks in place confirms you did it right.
Open the RAM slot clips on both ends. Some motherboards only have clips on one side. Line up the notch in your RAM stick with the key in the slot. This notch prevents incorrect installation.
Press down firmly and evenly on both ends of the RAM stick. You’ll hear and feel two clicks as the clips lock. The RAM should sit completely flush with no gaps.
For dual-channel performance, install RAM in alternating slots. Most motherboards label these as A2 and B2 for the first two sticks. Your motherboard manual shows the optimal configuration.
NVMe SSD installation takes seconds. Locate the M.2 slot on your motherboard. Remove the tiny screw holding the standoff. Slide your SSD into the slot at a 30-degree angle. Press it down flat and replace the screw.
Some motherboards include M.2 heatsinks. If yours has one, remove the protective film and install it over your SSD. These heatsinks prevent thermal throttling during heavy use, similar to how proper cooling prevents your gaming PC from overheating.
Preparing the Case and Installing the Motherboard
Remove both side panels from your case. Take out any pre-installed fans temporarily if they block access. This gives you room to work.
Install the I/O shield that came with your motherboard. This metal plate snaps into the rectangular opening at the back of your case. Push firmly on all four corners until it clicks.
Identify where your motherboard standoffs go. These brass spacers prevent your motherboard from touching the metal case. Most cases come with standoffs pre-installed for ATX boards. If yours doesn’t, screw them into the correct holes.
Lower your motherboard into the case carefully. Line up the I/O ports with the shield you just installed. Align the screw holes with the standoffs underneath.
Start with the center screw to hold the board in place. Then add the corner screws. Finally, add the remaining screws. Don’t overtighten. Snug is enough. You’re not trying to crush anything.
Connecting Power Supply and Front Panel
PSU installation depends on your case design. Most modern cases mount the PSU at the bottom with the fan facing down. This pulls cool air from outside the case.
Slide the PSU into its compartment with the fan facing the right direction. Secure it with four screws from the back of the case. Make sure the power switch and cable socket face outside the case.
Before connecting cables, plan your route. Good cable management improves airflow and looks cleaner. Route cables behind the motherboard tray when possible.
Connect the 24-pin ATX power cable to your motherboard. This large connector only fits one way. Push firmly until the clip locks.
Connect the 8-pin CPU power cable near the top of your motherboard. Some high-end boards have two 8-pin connectors. Use both if your board has them.
Front panel connectors are the fiddliest part. These tiny cables connect your case’s power button, reset button, and LEDs to your motherboard. Your motherboard manual shows exactly where each one goes.
The power switch and reset switch have no polarity. They work regardless of orientation. LED connectors do have polarity. The positive wire usually has a colored stripe or arrow.
| Cable | Purpose | Location on Board |
|---|---|---|
| 24-pin ATX | Main motherboard power | Large connector on right edge |
| 8-pin CPU | Processor power | Top left corner near CPU |
| SATA power | Drives and accessories | Individual cables from PSU |
| PCIe power | Graphics card | 6-pin or 8-pin connectors |
| Front panel | Case buttons and LEDs | Bottom right corner header |
Installing Your Graphics Card
The GPU installation is the final major step. This component is large, heavy, and expensive, so take your time.
Remove the PCIe slot covers from the back of your case. Most GPUs need two or three slots. Remove the appropriate number of covers.
Locate the topmost PCIe x16 slot on your motherboard. This slot runs at full speed. Push down the retention clip at the end of the slot.
Align your GPU with the slot and the case openings. Lower it straight down into the slot. Press firmly until you hear the retention clip click.
Secure the GPU bracket to the case with screws. This prevents sagging and stress on the PCIe slot.
Connect the PCIe power cables from your PSU to your GPU. Modern cards need one or two 8-pin connectors. Some high-end cards use new 12VHPWR connectors. Make sure these cables click into place completely.
Cable Management and Final Checks
Tidy cables improve airflow and make future upgrades easier. You don’t need perfection, just organization.
Group cables together with zip ties or velcro straps. Route them behind the motherboard tray when possible. Use the cable management holes in your case.
Leave some slack in cables. Tight cables stress connectors. A little looseness is fine.
Double-check every connection before closing your case:
– 24-pin motherboard power
– 8-pin CPU power
– RAM fully seated and clicked
– GPU power cables connected
– SATA cables for any 2.5″ drives
– All fans connected to headers
– Front panel connectors attached
Look for any loose screws or standoffs that might cause shorts. Remove any protective plastic films from components.
First Boot and BIOS Setup
Connect your monitor to your GPU, not your motherboard. Using the motherboard port means your GPU isn’t doing the work.
Plug in your keyboard and mouse. Connect the power cable to your PSU. Flip the PSU power switch to on.
Press the power button on your case. You should see lights, hear fans spin, and get a display on your monitor within 10-15 seconds.
If nothing happens, don’t panic. Check that the PSU switch is on and the power cable is fully inserted. Verify the front panel power switch connector is correct.
When the system boots, press the BIOS key shown on screen. This is usually Delete, F2, or F12. The key appears briefly during startup.
The BIOS lets you configure basic settings. Enable XMP or DOCP for your RAM. This ensures your memory runs at its rated speed instead of default slower speeds.
Check that the BIOS detects all your components. You should see your CPU, RAM amount, and storage drives listed. If something is missing, power down and check that component’s connections.
Save and exit the BIOS. Your system will reboot.
Installing Windows and Drivers
You’ll need a Windows installation USB drive. Microsoft provides a free tool to create one on their website. You need a blank 8GB or larger USB drive.
Boot from the USB drive by selecting it in your BIOS boot menu. The Windows installer walks you through the process. Choose custom installation and select your NVMe drive.
Windows installation takes 15-30 minutes. Your system will restart several times. Don’t interrupt this process.
After Windows loads, connect to the internet. Windows Update will find many drivers automatically. Let it finish.
Visit your motherboard manufacturer’s website and download the latest chipset drivers. Install these first.
Download your GPU drivers from NVIDIA or AMD’s website. Install the driver package and restart when prompted.
Consider optimizing Windows 11 for maximum gaming performance after your initial setup completes.
Common Mistakes and How to Avoid Them
New builders make predictable errors. Knowing them in advance saves frustration.
Forgetting the I/O shield. Install this before the motherboard. Removing the motherboard later to add it is annoying.
Not connecting CPU power. The 8-pin connector near the CPU is separate from the main 24-pin. Your system won’t boot without it.
Installing RAM in wrong slots. Use slots 2 and 4 (A2 and B2) for dual-channel mode. Check your manual.
Plugging monitor into motherboard. Use the GPU ports. The motherboard video outputs don’t work when a dedicated GPU is installed.
Overtightening screws. Snug is enough. You can crack PCBs or strip threads by going too tight.
Blocking airflow. Cable bundles shouldn’t block fan intakes or exhaust. Route them carefully.
Skipping standoffs. These prevent shorts between your motherboard and case. Use them all.
Not enabling XMP/DOCP. Your RAM runs slower than advertised without this BIOS setting.
Testing Your Build and Troubleshooting
Run some tests before declaring victory. Stress testing finds problems early.
Download CPU-Z to verify your CPU and RAM speeds. Check that your RAM runs at its rated frequency, not the JEDEC default.
Use GPU-Z to confirm your graphics card is recognized correctly. Check that it’s running at PCIe 4.0 or 5.0 speeds.
Install a game and play for 30 minutes. Monitor temperatures using HWInfo64. CPU temps under load should stay below 85°C. GPU temps should stay below 80°C for most cards.
If you experience crashes or blue screens, check RAM first. Run Windows Memory Diagnostic or MemTest86. Bad RAM causes more problems than any other component.
Random restarts often indicate power supply issues. Make sure all power cables are fully seated. Check that your PSU wattage is adequate.
No display output usually means:
– Monitor plugged into wrong port
– RAM not fully seated
– GPU power cables not connected
– CPU power cable not connected
Work through these systematically. Most issues have simple solutions.
Upgrading and Maintaining Your Gaming PC
Your new PC isn’t static. You’ll upgrade components over time.
The GPU is usually the first upgrade. Games become more demanding, and graphics cards see the biggest performance jumps between generations. Your other components can often stay the same for years.
Adding more storage is easy. Modern motherboards have multiple M.2 slots. Pop in another NVMe drive when you need space.
RAM upgrades are simple too. Buy matching sticks to what you have, or replace all your RAM with a larger kit.
CPU upgrades depend on your motherboard’s socket. AMD’s AM5 socket will support multiple CPU generations. Intel typically changes sockets more frequently.
Maintenance is minimal. Dust your PC every few months using compressed air. Clean your dust filters if your case has them. Reapply thermal paste every 2-3 years if you notice higher temperatures, though understanding cooling fundamentals helps prevent issues before they start.
Keep your drivers updated. GPU driver updates often improve game performance. Check for updates monthly.
Your Gaming Journey Starts Now
You’ve learned how to build a gaming PC from scratch. The process isn’t as scary as it seemed at first. You’re selecting compatible components, assembling them carefully, and configuring software.
Your first build takes time and patience. That’s normal. The second build goes twice as fast because you’ll understand the process. You’ll help friends build their PCs and wonder why you ever felt intimidated.
The gaming PC you built yourself performs better than pre-built alternatives at the same price. You saved money and gained knowledge. When something needs upgrading or troubleshooting, you’ll know exactly what to do.
Start shopping for components. Read reviews, compare prices, and make your parts list. Your custom gaming rig is waiting to be built. Once you press that power button for the first time and see your creation come to life, you’ll understand why so many gamers build their own PCs. The experience is worth every minute.

Post Comment