Mechanical Keyboards for Beginners: A No-Nonsense Buying Guide
Your fingers spend hours every day pressing keys. If you’re still using the flimsy keyboard that came with your computer, you’re missing out on a typing experience that feels better, sounds better, and lasts years longer. Mechanical keyboards aren’t just for gamers and tech enthusiasts anymore. They’re for anyone who types enough to care about comfort and quality.
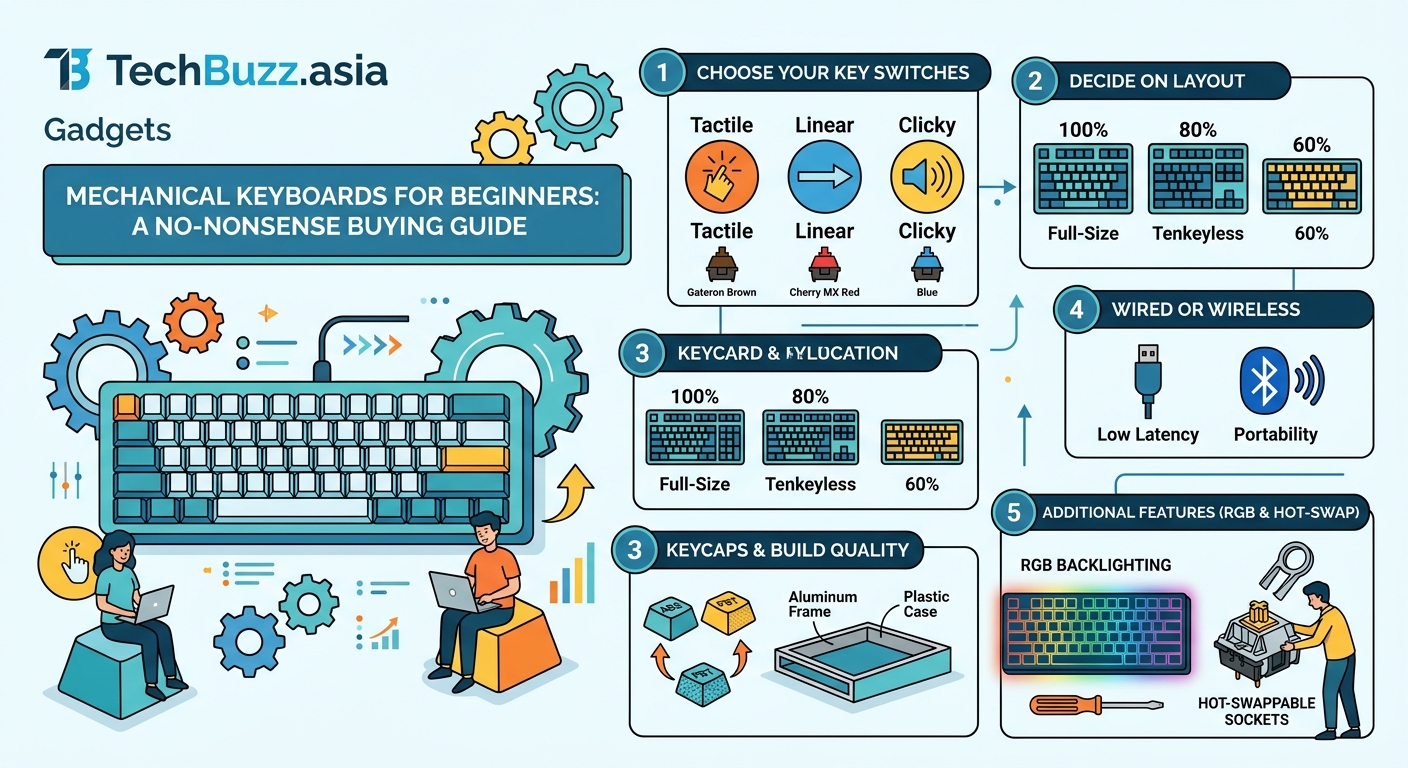
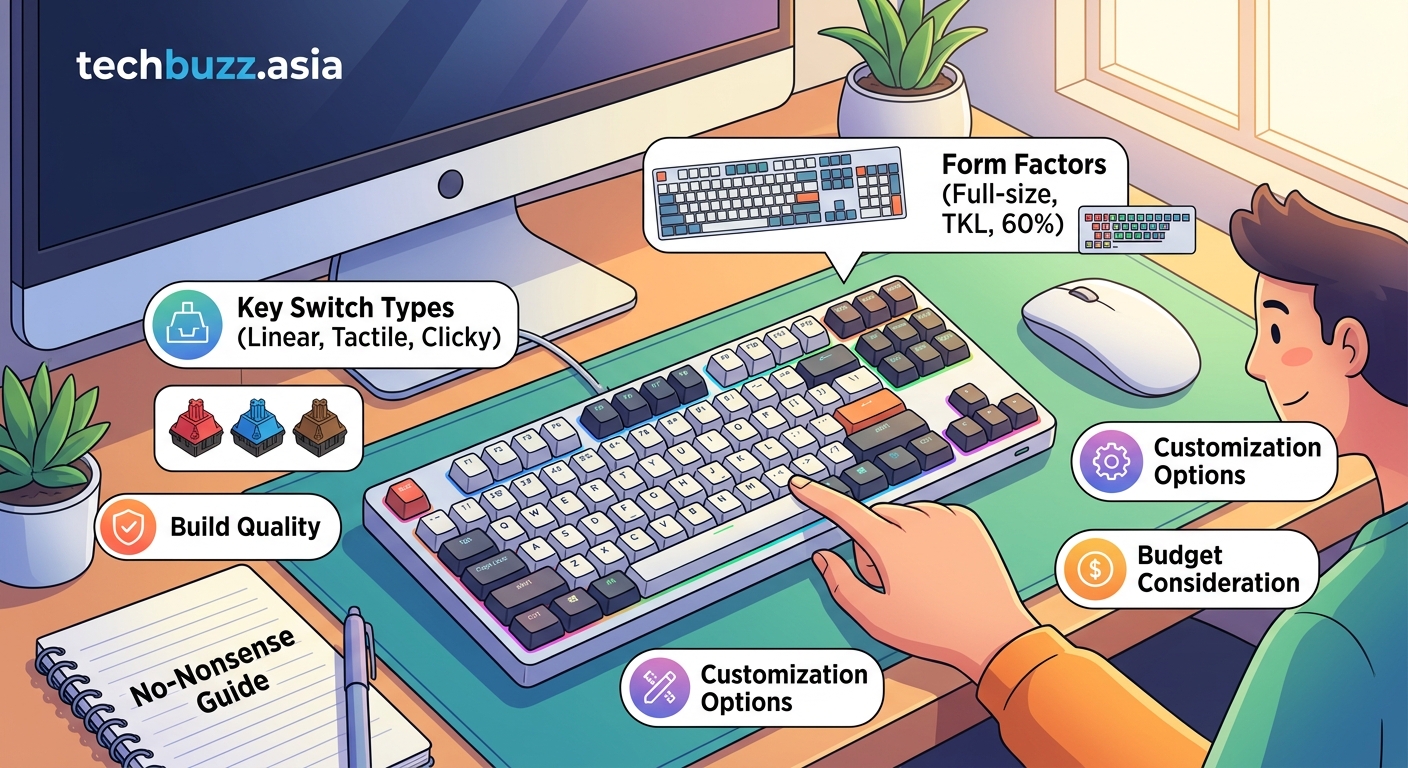
Mechanical keyboards use individual switches under each key instead of a rubber membrane, offering better tactile feedback, longer lifespan, and customizable typing experiences. Choose your switch type based on whether you prioritize quiet operation, tactile bumps, or smooth linear travel. Consider size, build quality, and connectivity before buying. Most beginners should start with a full-size or tenkeyless board with hot-swappable switches to test different options without commitment.
What Makes Mechanical Keyboards Different
Regular membrane keyboards use a rubber dome under each key. Press down, the dome collapses, and a signal registers. They’re cheap to make and quiet enough for open offices, but they feel mushy and wear out within a year or two of heavy use.
Mechanical keyboards use individual mechanical switches under every key. Each switch contains a spring and a mechanism that provides consistent feedback with every press. You can feel exactly when a keypress registers, which reduces typing errors and finger fatigue.
The difference becomes obvious after your first hour of typing. Your fingers don’t need to bottom out with force to register each keystroke. The switches do the work for you.
Most mechanical keyboards last 50 million keystrokes or more per switch. That’s roughly 10 to 15 years of typical use. Compare that to membrane keyboards that start feeling sluggish after 12 months.
Understanding Switch Types Without Getting Lost
This is where most buying guides lose people. They throw around terms like actuation force, travel distance, and switch colors without explaining what any of it means for your actual typing experience.
Here’s what you actually need to know.
Linear Switches
Linear switches move straight down with no bump or click. They’re smooth from top to bottom, like pressing a pen. Gamers love them because there’s no tactile bump to slow down rapid key presses during gameplay.
Common linear switches include Cherry MX Red, Gateron Yellow, and Kailh Box Red. They’re quiet compared to clicky switches but not silent. You’ll still hear the key bottoming out against the board.
Tactile Switches
Tactile switches have a small bump partway through the keypress. You feel exactly when the switch activates without needing to press all the way down. This makes them popular for typing because you get physical confirmation of each keystroke.
Cherry MX Brown is the most common tactile switch. It’s often marketed as a middle ground between gaming and typing, though many keyboard enthusiasts find the tactile bump too subtle. Stronger options include Glorious Panda and Boba U4T switches.
Clicky Switches
Clicky switches combine a tactile bump with an audible click sound. They’re the loudest option and the most satisfying if you love that classic typewriter feel. Your coworkers or family might not share your enthusiasm.
Cherry MX Blue and Kailh Box White are popular clicky options. Use them at home or in a private office, not in shared workspaces where the constant clicking will drive people up the wall.
“The best switch is the one that feels right to you. Don’t let online forums convince you there’s only one correct choice. Your hands and ears are the final judges.” – Keyboard enthusiast forums consistently repeat this advice, and it’s true.
Keyboard Sizes Explained Simply
Mechanical keyboards come in several standard sizes. The right size depends on your desk space and whether you use the number pad regularly.
Full-size (100%): Includes everything. Number pad, function row, arrow keys, and navigation cluster. Great if you work with spreadsheets or need the number pad for data entry. Takes up the most desk space.
Tenkeyless (TKL or 80%): Removes the number pad but keeps everything else. This is the sweet spot for most people. You get all the essential keys while freeing up mouse space for gaming or general use.
75% Compact: Squeezes the function row and arrow keys closer together, removing the gap between sections. Saves more space without losing important keys. Popular models include the Keychron Q1 and GMMK Pro.
65%: Cuts the function row but keeps arrow keys and a few navigation keys. Good for minimalist setups where you can remap missing keys to a function layer.
60%: No function row, no arrow keys, no navigation cluster. Everything’s accessed through function layers. Looks clean on a desk but requires a learning curve to use efficiently.
Start with full-size or tenkeyless unless you’re certain you can live without certain keys. You can always downsize later, but jumping straight to a 60% board often leads to buyer’s remorse.
Features That Actually Matter
Hot-Swappable Switches
Hot-swappable keyboards let you pull out switches and replace them without soldering. This feature is perfect for beginners who want to test different switch types without buying multiple keyboards.
You can buy a switch tester with 9 or 12 different switches, try them all, then order a full set of your favorite to swap into your board. If you’re interested in customization beyond just switches, you might want to check out the complete guide to building your first custom mechanical keyboard.
Keycap Material and Profile
Keycaps come in two main plastics. ABS is cheaper and develops a shine after months of use. PBT is more durable and maintains its texture longer. Most budget keyboards use ABS. Mid-range and premium boards often include PBT keycaps.
Keycap profile refers to the shape and height of the keys. OEM profile is what most people are used to. Cherry profile is slightly lower. SA profile is tall and sculpted like vintage typewriters. Start with whatever comes on your keyboard and experiment later if you want.
Wired vs Wireless
Wired keyboards have zero input lag and never need charging. They’re the default choice for gaming and professional use.
Wireless keyboards offer desk flexibility and work great for productivity tasks. Modern 2.4GHz wireless connections have negligible latency. Bluetooth adds slight delay and isn’t recommended for competitive gaming.
Battery life varies wildly. Some wireless boards last weeks on a charge. Others with RGB lighting drain in days. Check reviews for real-world battery performance.
RGB Lighting
RGB backlighting looks cool in marketing photos. Some people love it. Others turn it off immediately to save power and reduce distraction.
Per-key RGB lets you customize every key’s color individually. Single-color backlighting is simpler and cheaper. No backlighting saves money and battery life.
Don’t pay extra for RGB unless you know you’ll use it. The novelty wears off faster than you’d expect.
Setting Your Budget Realistically
| Price Range | What You Get | What You Sacrifice |
|---|---|---|
| Under $50 | Basic mechanical feel, likely Outemu switches, ABS keycaps | Build quality, switch variety, features |
| $50-$100 | Solid entry-level boards, Cherry or Gateron switches, decent build | Hot-swap, wireless, premium materials |
| $100-$200 | Hot-swappable switches, PBT keycaps, aluminum cases, wireless options | Boutique switches, custom layouts |
| $200+ | Premium materials, gasket mounting, QMK/VIA programming, enthusiast switches | Nothing if you value these features |
Most first-time buyers should aim for the $70 to $120 range. You get quality switches, decent build, and often hot-swap sockets without paying for features you might not need yet.
Popular boards in this range include the Keychron V series, Royal Kludge RK series, and Epomaker TH series. All offer good value and won’t embarrass you if you decide to upgrade later.
Common Mistakes First-Time Buyers Make
Buying based on looks alone leads to regret. That keyboard might look amazing in photos, but if the switches feel wrong or the layout frustrates you daily, the aesthetics won’t matter.
Ignoring return policies is risky. Some retailers don’t accept returns on keyboards once you’ve used them. Others charge restocking fees. Before making a purchase, it helps to know how to spot fake tech reviews before making your next purchase so you can trust the information you’re basing decisions on.
Overthinking your first purchase paralyzes decision-making. You don’t need the perfect keyboard right away. Get something solid in your budget, use it for a few months, and you’ll know exactly what you want in your next board.
Skipping the switch tester saves $15 but might cost you $100 if you buy the wrong switches. A tester with 9 different switches costs less than a meal out and prevents expensive mistakes.
Assuming expensive means better doesn’t always hold true. A $300 keyboard isn’t necessarily three times better than a $100 board. Diminishing returns kick in hard above $150 for most users.
How to Actually Choose Your First Board
Follow this process to narrow down options without getting overwhelmed.
-
Decide on size first. Measure your desk space. Think about whether you actually use the number pad. Pick full-size, TKL, or 75% based on your honest needs.
-
Choose your switch type. Order a switch tester or visit a store that has mechanical keyboards on display. Press different switches. Pick linear if you want smooth, tactile if you want a bump, clicky if you want sound and don’t care about noise.
-
Set your maximum budget. Be realistic. Include tax and shipping. Leave room for a wrist rest or extra keycaps if you want them later.
-
Filter by must-have features. Hot-swap if you want flexibility. Wireless if you hate cables. Specific connectivity for Mac or Windows compatibility.
-
Read actual user reviews. Not just the top positive reviews. Look for complaints about build quality, switch consistency, and software issues. Reddit’s r/MechanicalKeyboards has buying guides and user experiences worth reading.
-
Check availability and shipping times. Some popular models sell out for weeks. Factor in whether you can wait or need something available now.
-
Buy from retailers with good return policies. Amazon, mechanical keyboard specialty shops, and major electronics retailers usually accept returns within 30 days if the product isn’t what you expected.
Software and Customization Options
Basic keyboards work plug-and-play with no software needed. Function keys and media controls just work.
Keyboards with onboard memory let you program custom layouts and lighting without software running. The settings stay on the keyboard even when you switch computers.
QMK and VIA firmware offer deep customization. You can remap any key, create layers, program macros, and adjust typing behavior. The learning curve is steeper but the control is unmatched. Enthusiast boards often support these open-source options.
Proprietary software from brands like Razer, Corsair, and Logitech offers easier interfaces but locks you into their ecosystem. The software needs to run in the background, using system resources.
For your first board, don’t worry too much about advanced programming. Get comfortable with the basics first. You can always upgrade to a more customizable board later.
Breaking In Your New Keyboard
Your first mechanical keyboard will feel different. The key travel is longer than membrane keyboards. The switches might feel stiffer or require adjustment in your typing technique.
Give yourself a week to adapt. Your typing speed might drop initially as your muscle memory adjusts. This is normal. Most people recover their speed and exceed it within two weeks.
The switches will feel slightly different after the first few thousand keystrokes. This break-in period smooths out manufacturing inconsistencies and seats the springs properly. Some switches change noticeably, others barely at all.
Sound will change as the board settles. Stabilizers might rattle less after use. Switches might get slightly quieter. Don’t judge the final sound profile in the first few days.
Accessories Worth Considering
A wrist rest reduces strain during long typing sessions. Match the height to your keyboard’s profile. Memory foam and wooden rests are popular options.
Extra keycaps let you customize appearance or replace worn keys. Make sure they’re compatible with your switch type. Cherry MX-style stems fit most switches.
A keycap puller helps remove keys for cleaning without damaging them. Most keyboards include a basic wire puller. Upgrade to an aluminum puller if you plan to swap keycaps frequently.
Switch pullers are necessary for hot-swappable boards. They safely extract switches without bending pins. Usually cheap and included with hot-swap keyboards.
Lube and films are for enthusiasts who want to modify switch feel and sound. Skip these until you’re sure you want to go down that rabbit hole.
Where This All Leads You
Choosing your first mechanical keyboard doesn’t require a degree in engineering or weeks of research. You need to know what size fits your desk, what switch type matches your preference, and what features matter for your daily use.
Start simple. Get a board with hot-swappable switches in your budget. Use it. Learn what you like and what annoys you. The mechanical keyboard community is full of people who own five boards because their preferences evolved over time.
Your first board probably won’t be your last, and that’s fine. Each one teaches you something about what works for your hands and your workflow. The mushy membrane keyboard you’re using right now has done its job. Time to feel the difference that real switches make.
Post Comment